In this guide I will walk you through how to Install WordPress on Cyberpanel. If you’ve already set up CyberPanel on a VPS, you can go to the next step. Just incase you have not installed cyberpanel on your VPS machine check out my previous post on how to Install CyberPanel on contabo VPS. You can also check the medium version of the installation here.
In this guide, We’ll walk through how to Install WordPress on Cyberpanel so you can launch a WordPress site, using CyberPanel’s one-click installer. By the end, you’ll have WordPress up and running, with databases, domains, and security configured to keep things smooth and scalable.
Installing WordPress on CyberPanel
I am sure by now you have installed cyberpanel on your VPS and if you haven’t; please check out the article I shared at the first paragraph.
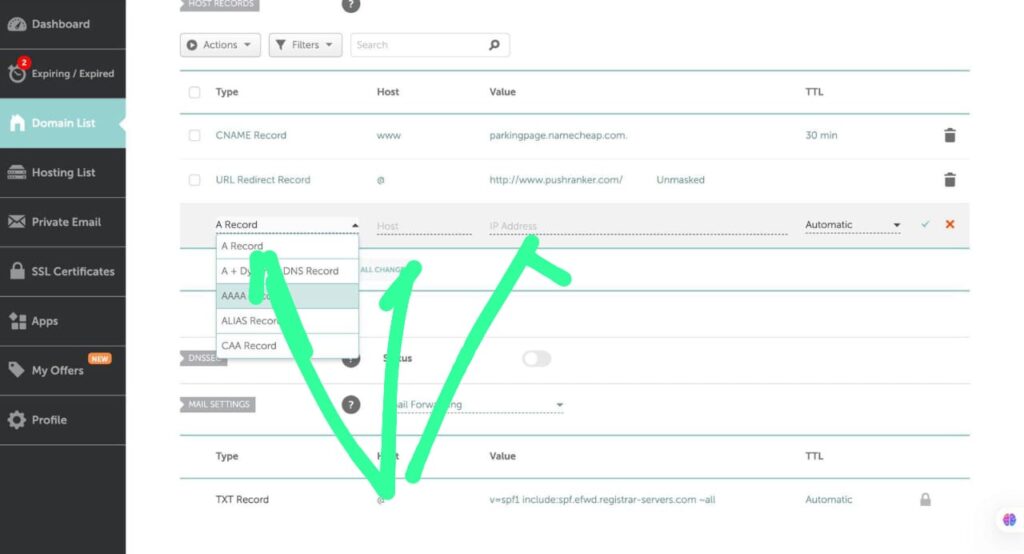
Also, ensure to map your domain name. This is so that you can access your website with your domain name instead of your vps IP address. Let’s take namecheap for instance; to map your domain to a VPS IP on Namecheap:
Log in to your Namecheap account and go to the Domain List. Click ‘Manage’ next to the domain you want to configure. Select the ‘Advanced DNS’ tab.
In the ‘Host Records’ section, you’ll find the option to add a new record. Create an A record. In the ‘Host’ field, enter ‘@’ (which represents your domain) or a subdomain.
In the ‘IP Address’ field, enter the IP address of your VPS. Finally, save the changes. It may take some time for the DNS changes to propagate across the internet.

Once your domain mapping is done, you need to access your cyberpanel dashboard to be able to create a wordpress website.
Accessing CyberPanel
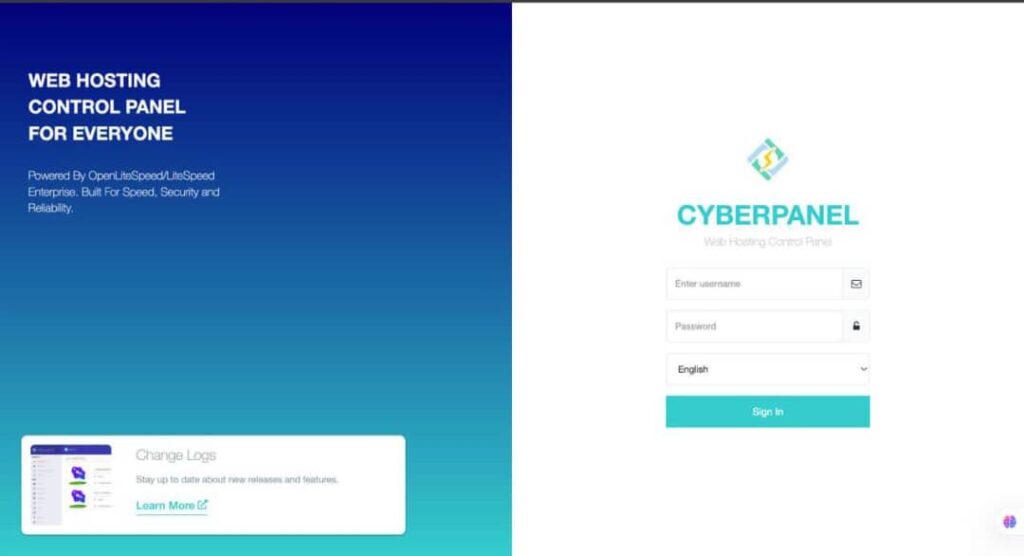
- Log in to CyberPanel dashboard: To login to cyberpanel go to https://yourdomainname.com:8090/. You will see a login page as in below:

If for any reason you don’t know your password, login to your server via ssh and run the following command:
sudo cat .litespeed_password
Then you should have your password displayed on the terminal. Also note that the username is ‘admin‘
Creating a website on Cyberpanel
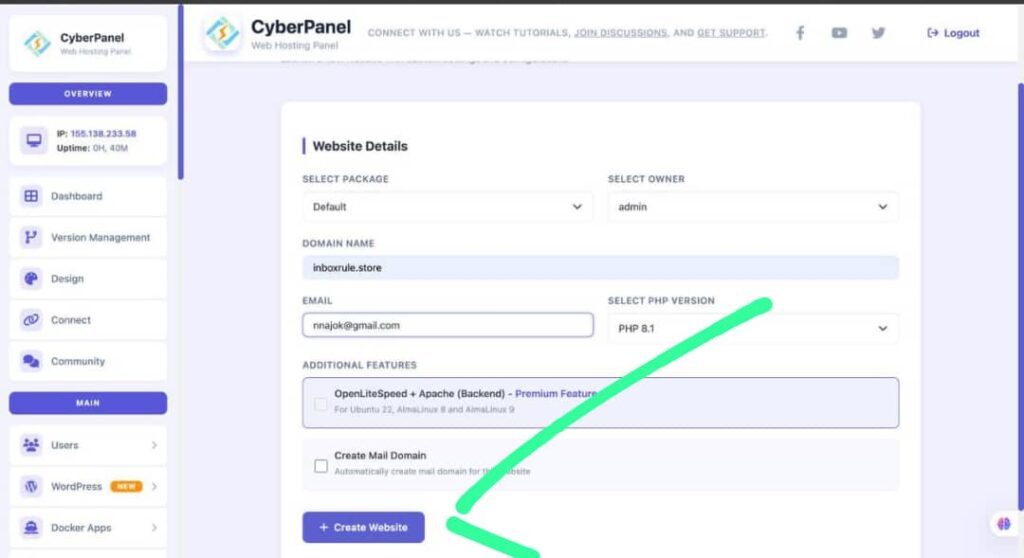
- Navigate to Websites > Create Website

- Enter domain name
- Select package as default
- Select owner as admin
- Enter your email address
- Choose PHP version and handler
Now go to websites > list websites > select the domain you added to cyberpanel > Click on manage
Installing WordPress
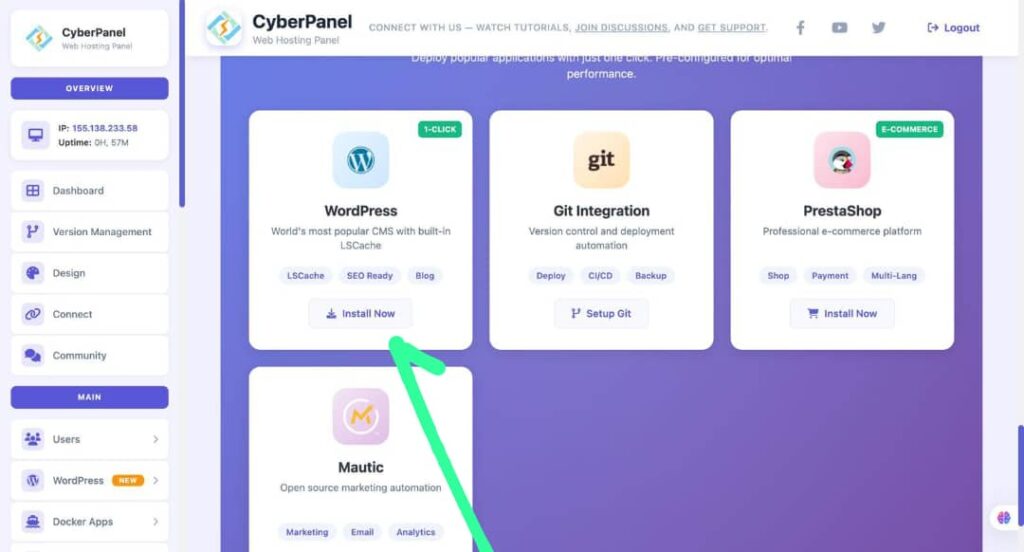
Now Scroll down and you will wordpress once-click installer option as seen in the picture below:

- Choose WordPress > Install WordPress
- Set WordPress admin username and password
- Enter your email address and ensure the installation path or directory is left empty. This is so that wordpress can be installed on the root of your domain. Now launch wordpress and wait for a moment for cyberpanel to install wordpress for you. Then visit your domain and you should see wordpress installed already.
Post-install basics
- Log in to WordPress: https://yourdomain.com/wp-admin
- Run recommended plugins/themes (keep it lean initially)
- Enable SSL:
- CyberPanel > SSL > Manage SSL > Cert Manager
- Permalinks setup: Settings > Permalinks > Post name
- Ongoing optimization
- Backups: CyberPanel > Backup/Restore > Schedule backups
- Caching: CyberPanel > OpenLiteSpeed/LSCache configuration
- Resource monitoring: CyberPanel dashboard widgets or server stats
- Security hygiene: update WordPress core/themes/plugins regularly
This is basically Install WordPress on Cyberpanel and run your wordpress website. I will be in the comment section. if you have any question you can ask or open a question in our forum.
